From Seed To Harvest A Guide To Indoor Gardening Success
If you're looking to start your own indoor garden, seed starting is a great way to get started. With the right techniques in place, you can ensure the success of your seedlings and watch them grow into beautiful plants.

How to Start Seeds Indoors
Starting seeds indoors can be a bit daunting at first, but it's actually quite simple. Here are the basic steps you'll need to follow:
- Choose a location: Find a spot in your home that receives plenty of natural light. A south-facing window is ideal.
- Get your supplies: You'll need seed starting mix, containers (egg cartons, plastic cups, or peat pots), and seeds.
- Prepare your containers: Fill your containers with seed starting mix and moisten the soil.
- Add your seeds: Follow the instructions on the seed packet for how deep to plant the seeds.
- Provide light: If you don't have a south-facing window, you'll need to supplement light with grow lights.
- Water appropriately: Be sure to keep the soil evenly moist, but not too wet.
Tips & Tricks for Indoor Seed Starting
Now that you know the basics of starting seeds indoors, here are a few tips and tricks to help you ensure success:
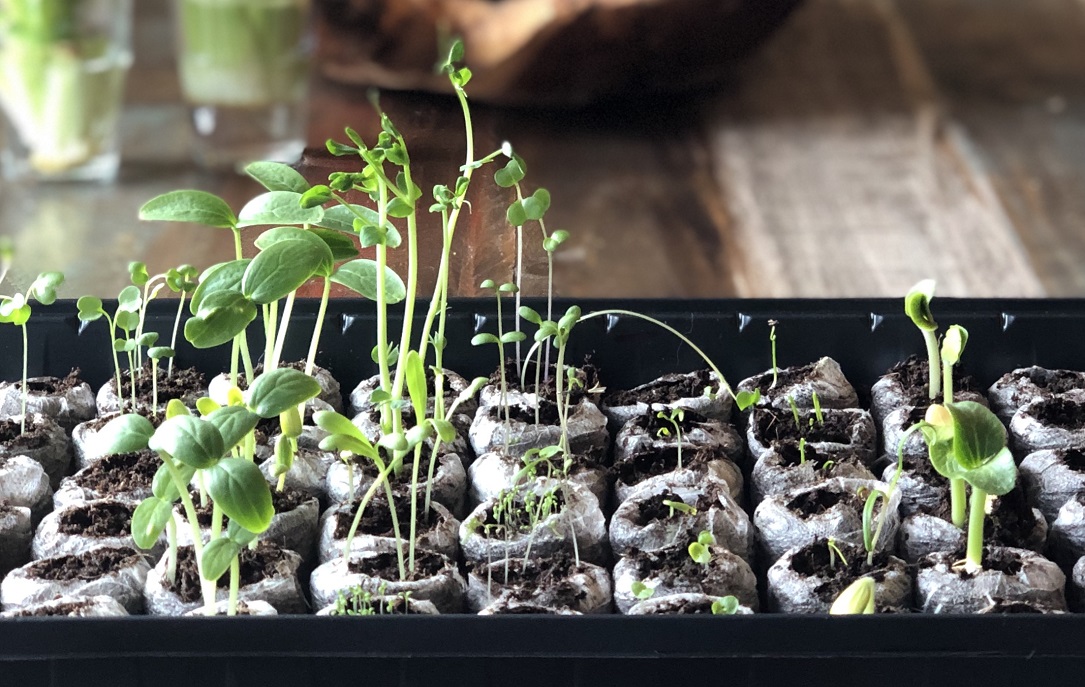
- Choose the right container: While you can use egg cartons or plastic cups to start your seeds, peat pots are a great alternative. They are biodegradable and can be planted directly in the ground, which means less stress for your seedlings when it comes time to transplant them.
- Use a seedling heat mat: Seedlings love warmth, and using a seedling heat mat can help speed up germination and promote healthy root growth.
- Label your containers: Be sure to label your containers with the type of seed you've planted and the date you planted them. This will help you keep track of which seeds are which and when they were planted.
- Thin your seedlings: Once your seeds have sprouted, you'll need to thin them out. This means removing the weakest seedlings so that the others have more room to grow.
- Fertilize when necessary: Seed starting mix usually contains enough nutrients to get your seedlings off to a good start, but you'll need to fertilize them once they start growing their true leaves.
- Harden off your seedlings: Before you transplant your seedlings into the ground, you'll need to harden them off. This means gradually exposing them to outdoor conditions, such as wind and sun, so they don't get shocked when you move them outside.
By following these tips and tricks, you'll be well on your way to indoor seed starting success. Have fun and happy gardening!

www.bethsgig.com - planting pflanzt planten seme agricoltore landwirt zaden coping approaches adaptation autonomous zaad landbouwers landbouwer grond aard landwirts boden newsday same
simpleecomama.com - seed starting indoors gardening journey

www.pinterest.com -
www.pinterest.com - empressofdirt
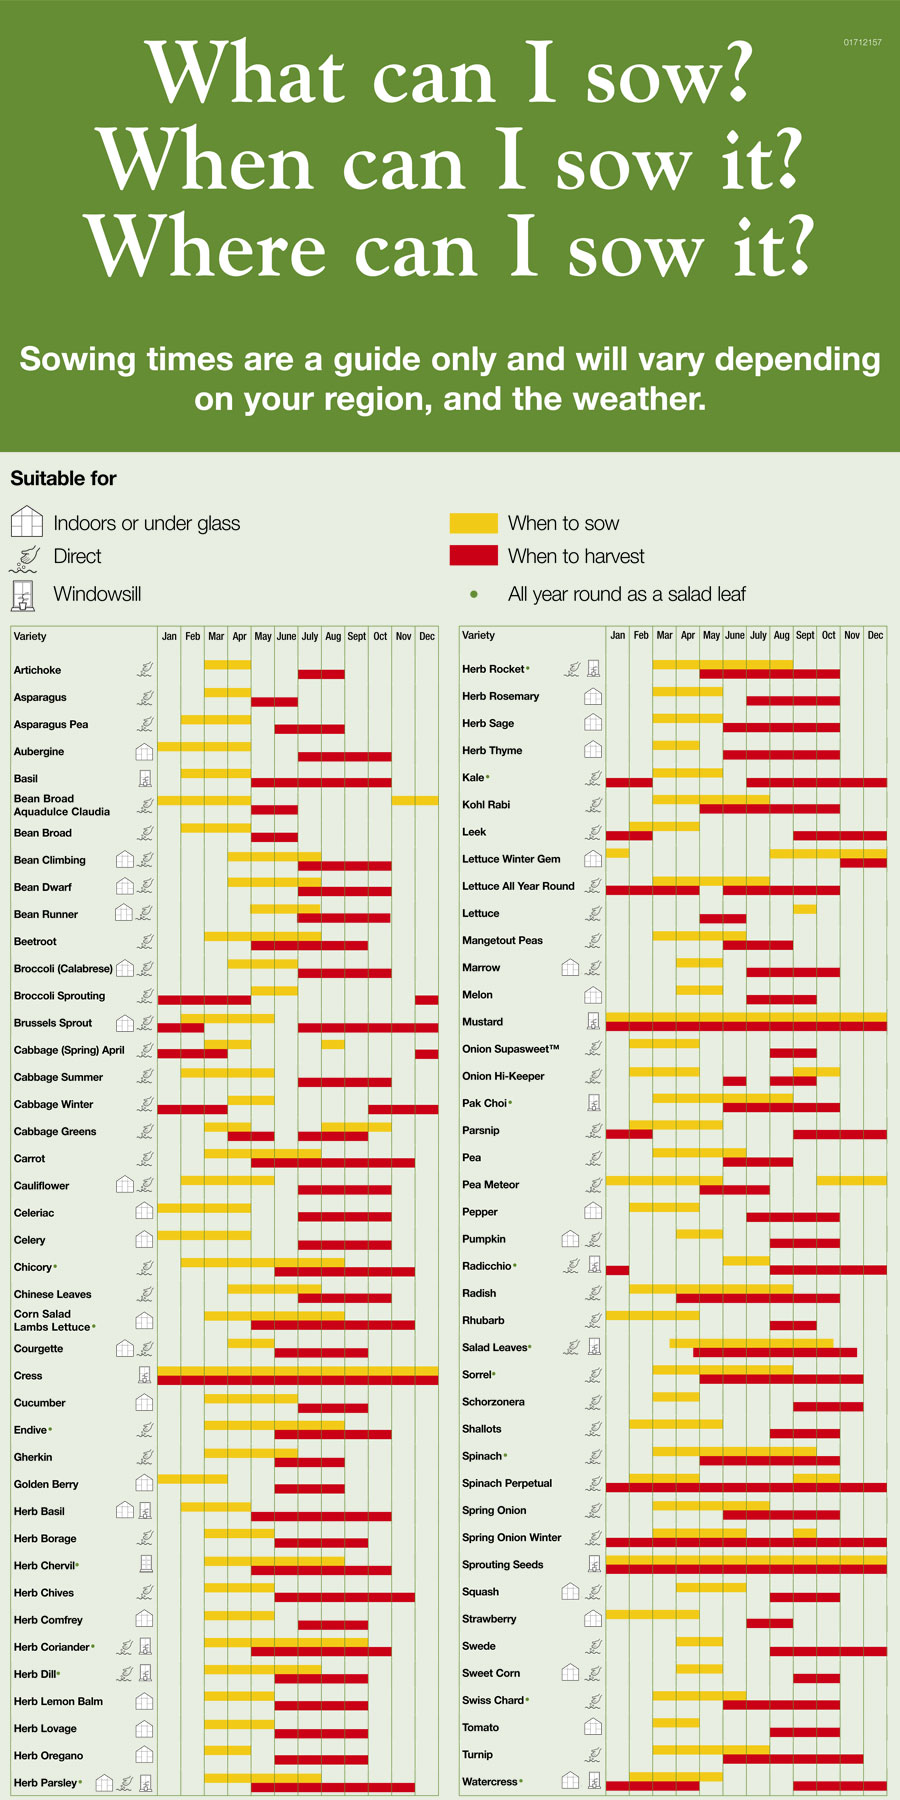
www.thompson-morgan.com - sowing morgan veg thompson
Post a Comment for "From Seed To Harvest A Guide To Indoor Gardening Success"